Showing posts with label art. Show all posts

Wednesday, October 31, 2012

The Darkride Show Scene Simulation Experiment

About a year I had an idea to create a working miniature of some of Bill Tracy's classic darkride gags.  If you don't know who Bill Tracy is, well he's "the greatest designer and builder of dark attractions the amusement industry has ever seen." I got that quote from the home page of The Bill Tracy Project were you can learn more about Bill Tracy's career if you wish too. 

Anyway I toyed with this idea, and then dropped it.  I didn't think anything new would be learned about Tracy's legacy.  And frankly, I didn't know where to start, or what I'd do with what I created when finished.
I mean, how big will this thing be, and where would I store it.  I've got enough clutter in the basement.

Then I had the idea of creating my own original darkride scene.  Obviously the appeal of this is doing something I designed, and not aping someones existing work.


I gave this some thought.  Sketched a few ideas.  Then I wondered how to do it, how much it would cost, and again, what to do with what I created when finished. 


There would certainly be a steep learning curve. I've never built anything like this before. The mechanics of getting my scene to work would take some serious R&D, and building miniature the sets and figures would take time with plenty of trial and error.  I eventually procrastinated long enough that I basically lost interest in doing it at all.


Wrapping up long winded intro, I finally came up with the idea to do something quickly, and on the cheap.  This "spooky darkride show scene simulation experiment" (it just rolls off the tongue) was built pretty much entirely with stuff I had in the house, and was constructed in about 8 hours total spread out over a few days.


Hopefully this looks like it came out of a small amusement park's haunted house...


Postmortem: Behind the Scenes...


The only real pre-planning I did for this scene was drawing one sketch for the Frankenstein Monster.


I liked the idea of doing a Son of Frankenstein costume mixed with a I Was a Teenage Frankenstein look.  I manged to get the Teenage Frankenstein, but didn't have the sewing skills or the fabric for a Son of Frankenstein costume.  I settled on the bandages look because that was something easily doable.    


I sculpted the head out some old air dry clay I bought years ago.  The clay had become pretty dry, and hard to work with but I managed.  I had some sculpting tools from a high school ceramics class that I wanted to use, but unfortunately I couldn't find them.  I ended up using toothpicks and my fingers to sculpt with.


The body is made of scrap wood, wire and duct tape.  If you notice I remade the legs. The originals were way too small. 


Once dry I gave the face a black base coat.  I thought the green florescent paint would really pop on the black, but the florescent spray paint was old and wasn't very opaque. 


I did spend about $13 on fluorescent paint.  I thought I was smart when I found this Puffy Paint Neon 12 Pack...


... but I didn't look very closely and notice that "& Bright" under the "Neon."  Only 5 of the 12 colors fluoresced under black light, and I had to pick up a separate bottle of blue florescent paint. Later, I saw this company makes a glow-in-the-dark color 12 pack that I really wish I had used instead.  I'm sure that set could have worked a lot better.


Also if anyone else reading this ever thought about using "Puffy Paint" like regular paint, well, it kinda works.  As you can see above the paint is streaky and isn't very opaque when brushed around.


Now with the "work lights" on...


Show Lights On


Work Lights On
 
You can see how extra crappy everything looks with regular lights on. The black light hides many, many sins, and for that I'm very, very grateful.  


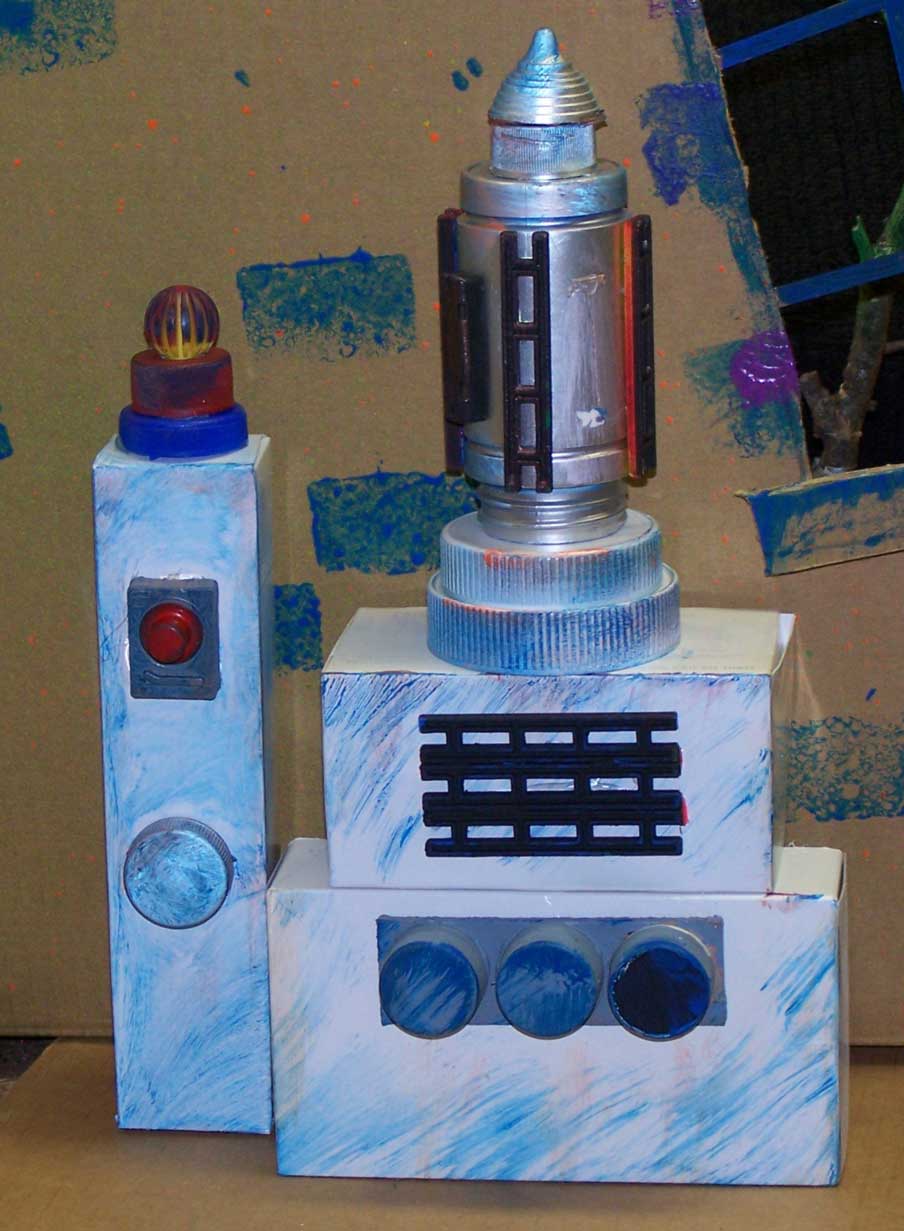
The lab machine are various food boxes I raided from my pantry.  I spray painted them white, glued on some plastic junk, and then dry brushed them with the florescent paint.  I was thinking the dry brush technique would make them look like old corroded metal.  Mixed results on that idea.  I put night lights in two of the boxes hoping to achieve a 
LITE-BRITE effect, but I don't think the tiny plastic "lights" I used really show up very well.


Another thing that didn't show up very well was the tree outside the window.  The tree needed its own black light, and the strobe I was using for lightning should be brighter.   


Here's a nice close-up of the Monster...


...and a side-view just for the heck of it.
 
Now since this thing basically didn't cost anything I can chuck the whole thing in the trash without any remorse.  Well I'll hang on to the Frankenstein Monster for now, but the rest goes.   


Tuesday, December 13, 2011

Crazy Christmas Cavalcade: Christmas on Easter Island

Here's another new animation for the holidays.

It's a new animation based on an old Christmas card I made years ago...


If you're an avid reader of this blog maybe you remember this card from a post way back on December 7, 2007.


Hmm, I think I like the way I originally drew that Santa hat better than what I've drawn in the new animation.

Thursday, November 24, 2011

Happy Wacky Thanksgiving

Happy Thanksgiving everybody.

To celebrate the day of the big feast here's my salute to the greatest food related comedy of all time...


Acknowledgments to Norman Saunders the master artist of the Wacky Packages. 

Thursday, November 3, 2011

Commentary on The Story and Song from the Haunted Mansion Animated


Well Halloween is over, and for those interested here's a quick commentary on my animation of the classic The Story and Song from the Haunted Mansion.


Back in 2009 when I made the Unused Concept Art from the Haunted Mansion  Animated I used the record cover art by Collin Campbell for the open.  At the time I thought it would be cool if the cover art would animate, but the prep work needed to do this was a monumental chore in its self.

So I basically forgot about it for 2 years, but this summer I thought I should finally do it for this Halloween.  Early on I thought I would just animate the cover art, but I soon decided I would animate some (not all) of the "Story and Song" art.

Okay now I'll go through the animation one shot at a time...

The cover art was the biggest chore to animate (and a bigger chore to prep), and there over 30 moving characters and elements. Originally I thought I might try to make it 3D, but that was way too difficult.  The audio mix was a challenge too. I first thought I might just use the music of the band members and opera singers, but I quickly learned hearing those opera singers for any extended period of time is pretty brutal.  I decide to fade the singers out and primarily use the ballroom music which I had used back in 2009 on the concept art animations.   At the end of the open when the titles appear I brought in a little bit of the title theme from The Haunting (1963).


It's been reported that this movie was influential during the creation of Disney's Haunted Mansion.  I also used the spooky look of The Haunting's opening titles (which look very much like the effect used on the type in the above trailer), and ghostly transitions used during the first few minutes of the film where the history of Hill House is told.  If you haven't seen the movie, or don't know what I'm talking about you can check it out here if you wish.

I like animating Haunted Mansion art that hasn't been done in real life.  That's what appealed to me about animating unused concept art, and it's this philosophy that guided my choices when I animated the "Story and Song."

The first page

Like the above opening page has almost nothing to do with the Haunted Mansion attraction.  Sure there's an executioner in the ride, but he is singing in the graveyard and not opening the front door for you.  I thought I could use a 3D camera with a short depth of field to get this shot, but it was impossible to get the framing correct so I cheated the look in 2D.  It's not perfect, and it's something I wish I had more time to finesse.

Madam Leota

I know Madam Leota is in the attraction, but I animated this art because Collin Campbell staged the seance scene so differently from how it looks in the attraction.  I love how lively the room looks here.  In recent years the Disney Imagineers have gotten Madam Leota to float in the air, which is a neat trick, but I'd be truly amazed if they could make all the furniture float like it does here.

A wide shot of The Bride

The bride art is not by Collin Campbell.  It's by me.  Did I fool you?  I hoped it looked like Campbell's work, but the talent gap between me and Collin is pretty huge.

I based the look of the Bride after a couple early versions, but mostly this maquette...


I've borrowed this photo from the encyclopedic Haunted Mansion blog Long-Forgotten.   HBG2, who owns the blog, is using a Photoshoped photo of the "corpse bride" I did so I don't think he'll mind too much.  I know she doesn't look much like an actual bride, but she is a very early version of sorts.  For hardcore Mansion fans there's also a couple of "Easter Eggs" in my Bride scene, like the bust on the sideboard and the hanging portrait. 

CU of Bride art before animation

Above is a close-up of the original art.  You can see the skull face which is something that I experimented with. I though it might look cool if you saw the skull flicker as her heart beat, but I dropped that idea.  One idea I did keep was a faint flicker of the artery and veins that surround the heart, but I don't think it's very noticible in the final animation. Also starting with the Bride I tried to make my shots a little more POV (point of view).

Hatbox Ghost

Here we have the most infamous Mansion resident - the Hatbox Ghost.  The history of this character is well known by Mansion fans, and so I had to include him.  He's been long absent from the Mansion, but the hope is strong among the faithful he'll return one of these days.

Last Page


Lastly we have the escape thru the crypt ending and that crazy alien-like ghost with the yellow eyes.  This is where the POV becomes the most obvious (with mixed results).   I which I had more time to finesse this shot a little more.  I think if I made the shot 3D the POV would work better, but prepping the art for 3D would have taken time which I didn't have. 

Well that's it.  Thank you for reading this, and thanks to those of you who have left comments.  Thanks to Disney for not getting upset with these fan creations of mine.  The Story and Song from the Haunted Mansion is available on CD, so if you don't have a copy for yourself go get one now.  I think this will be my last animated trip into the world of Disney,  but rest assured I have ideas for other fun and stupid animation in the future.

Monday, October 26, 2009

Monster Monday #4: The Scary Ghost

For my last Monster Monday I've departed further from the original drawing than ever before. I don't know if that's a good thing.

I made the drawing above some time in middle school, and I remember I was trying to draw something super scary. This time it was a sinister shrouded ghost with glowing red eyes. Hooded ghosts are a dime a dozen, and even back then I was attempting to make my ghost different. I intentionally stretched the proportions of the neck (maybe I was influenced by E.T.), and gave the ghost an X-ray look with a visible skeleton. I don't think I was very satisfied with what I drew since I didn't complete the drawing. Also the little doodle in the bottom left is sorta mocking the ghost.

For my 2009 update, I wanted to get as far away from the cliche shrouded ghost as possible. So I made the ghost an alien. I liked the stretched out neck of the original, and that works for an alien. The bony appearance works too, and I got to indulge my six pack abs fetish (after countless hours of doing ab exercises, I've only manged to get something like a 2.5 pack in real life unfortunately) by giving my alien an unearthly set of abs. I then thought what's the scariest thing that supposedly "real" aliens do to people... You know what I'm talking about, so I don't need to tell what the device he's holding is used for. The vague S&M leather gear getup I gave my alien works for this aspect as well.


Monday, October 19, 2009

Monster Monday #3: The Horrible Demon


The drawing above I made when I was in junior high. It was my attempt to make something extremely scary. I think I was inspired by the film Poltergeist, even though that movie isn't known for its monsters, there is that one scene near the end with the ghostly creature in the hallway.

Poltergeist 1982

My take on this creature this was to make it extra gross looking with rat-like hair and diseased looking skin. Drawing my new version of this monster was sorta a nightmare. I started with a much more dynamic pose, but that was a headache to draw so I changed it at the last minute to look more like the original drawing.

Monday, October 12, 2009

Monster Monday #2: The Evil Muppet Monster

Time again for another of my "then and now" monster drawings...

I made the drawing above sometime around the 8th grade. I remember I started drawing the redheaded guy with the intent of making some sort of goofy Alfred E. Neuman-like character. I didn't like what I drew, and left him half-finished. A short time later I drew the monster behind him to eat him up.

Looking back at this old drawing I like the subtle line of action on the monster has, and I also think he sorta looks like a Muppet.

It's funny, for my 2009 update I still don't like the redheaded guy. I think his design could be better, and his construction is a little wonky too. I'm glad there's another big monster behind him ready to eat him up.

Monday, October 5, 2009

Monster Monday #1: The Deadly One-Eye Monster

I was a kid who loved monsters, and would draw them all the time. For this month-long Halloween celebration, I thought it would be fun to dig up some of my childhood monster drawings, and redraw them now as an adult.

The monster above I drew when I was about 9 years old. Surprisingly, I still have memories of drawing this. I remember I was attempting to create the ultimate deadly monster. It had electricity it could shoot from its head antennae and tail. The creature has two whip-like appendages with spike balls at the end that is can swing to hit its opponent with. Last but not least, one arm was a claw. I don't know why I gave the monster human-like feet (FYI: yeah those were how I'd draw human feet), I probably thought it was funny. Also I believe I was attempting to use about every color of marker I had too.

So now without further delay, people of the Internets, I present to you the new and updated "Deadly One-Eye Monster" for 2009...

Monday, March 17, 2008

Early 1960's Ford Motor Filmstrip Art

Here are a few pieces of art from the early 1960's for a Ford Motor Company filmstrip.

I don't know the name of the filmstrip, or what exactly this filmstrip was used for - maybe it was educational or maybe it was promotional.

What I do know is the artwork is full of retro charm.


EXTRA FUN FACT: This artwork was created using a paper cut-out method. The rubber cement that held the artwork together has become so old that it is loosing its stickiness, and some of the cut-outs have fallen off and been lost. Using the power of our futuristic computer age I've attempted to digitally restore the missing pieces. Can you spot my work?

Sunday, February 24, 2008

Lifebuoy Radio Animation

A while ago a producer I was working with asked me about lip sync animation. I told him I had done that before for some local commercials, but didn't a quality example to show him. So I decided to make something new.

I found an old radio commercial for Lifebuoy soap recorded in 1945. This commercial has some unintentional funny audio which I thought would work well for my animation.

This radio spot is the only audio used in this project. I was very tempted to add sound effects to some of the crazy things I animated, but I resisted the temptation (in fact the audio abruptly cuts out at about a second from the end, and I didn't try to smooth that out either). All the art work is 100% original, and I created it exclusively by me for this project.

I think it turned out pretty good, and I think you'll enjoy if you appreciate my kind of "humor."


About the only thing I knew about Lifebuoy soap is that it's the soap of choice if you wish to punish Ralphie, so I did the Wiki on Lifebuoy and found some interesting facts. The soap is still manufactured today in India, and is popular in Asian countries. Also Lifebuoy coined the term "B.O.", short for "body odor." So now you know, and knowing is half the battle.

Sunday, February 3, 2008

Should I Have Gotten a Patent?

A few months ago I was walking though the Bed, Bath & Beyond, and a TV remote control catches my eye. I wasn't shopping for a remote, nor did I need one, but what was remarkable about the the remote was its size - it was huge. It looked to be about 12''long and 6''wide (which coincidentally is how I describe myself on Craigslist. Hey-ohh!).

Then weeks later as I was combing through the Sunday newspaper, I saw the Jumbo Remote in a JC Penney ad. I pulled the ad, and set it aside so I could show it to you...

JC Penney Ad

Of course with the vast power of the internet at my fingertips, I could have just simply Googled "jumbo remote control."

Web Site with the Jumbo Remote

So what's my point? I'm glad you asked. Back in the 1990's I use to do cartoons for the local cable commission newsletter. These single panel cartoons alway had some sort of television related gag. For example take a look at this one...

Notice something familiar? Oh right, it's about a giant remote control! If I had only known back then I was sitting on such a lucrative money making idea. I could then today be cruising around on my fifty million dollar yacht, drinking mimosas with a bunch of sexy models at my side.

Well I don't really know how lucrative the jumbo remote control market is, but I imagine it's huge because it makes for a more dramatic post.

Monday, December 31, 2007

Holiday Lights

To ring in the New Year, I present to you the holiday animation I made for 2006. Here's the text I sent to friends to setup the animation:

Dear friends,

I've been doing holiday illustrations for a while now, but recently I've received numerous requests to do a special animation for the Christmas season. So in the spirit holiday giving, here it is - an animated festival lights.

If I may say so, I think it's quite a thing of beauty which perfectly captures the illuminated holiday displays of the season. But isn't not just a spectacle for the eye, oh no, the music for this animation was carefully selected for it's emotional impact. Extra bonus points to anyone who can identify the rich orchestrations I used in this short.

It's my sincerest hope you'll enjoy this celebration of electrical wonders, and harmonious sounds of the season. So without any further adieu, please join me as we visit a serene and picturesque winter carnival where the magic unfolds...


Not to belabor the joke, but here's an explanation in case my animation left you scratching your head.

So the "joke" was what you could call a switcheroo. In the setup I made it sound like I was animating elaborate holiday light displays, and I start the animation with fancy orchestra music and the winter carnival setting. But I then start pulling away from the carnival, and switch to wacky animated neon and illuminated signs that have holiday themes edited to the music from the closing credits of the Bullwinkle show.

But you probably knew that didn't you?

Sunday, December 30, 2007

Homemade Christmas Card Retrospective #7

I discovered Microsoft Publisher in 1997, and thought it would be a great tool for creating my cards (I'd barely even heard of the Adobe's Photoshop or Illustrator back then). Kinko's told me they could print my Publisher file directly on to card stock. Great news! This was going to be my best card yet, but, unfortunately, due to some odd quirk my artwork printed in B&W. So I had to settle for some weird colorized look...

Front

The colorized look sorta works since my card was supposed to resemble a poster for an old cartoon. Still I would have preferred my artwork to be in full color, so for the first time ever here's my original art...

Original Art

On the inside I made up a fake news clipping about my fake cartoon...

Inside

And finally my fake company name for the year...

Back

Well this completes my homemade card posts for the season. Thanks to everyone who left comments, or emailed with some kind words. I truly appreciate it.

Friday, December 28, 2007

Homemade Christmas Card Retrospective #6

I used a paper cut-out technique for the art on my 1996 card. This wasn't my attempt to copy the look of South Park (South Park didn't premiere until 1997), but to copy the look of Mary Blair. Mary's art is very cute and charming, and I wanting my elves to look cute even if they were doing something very weird.

Front

Head cheese has to be one of the grossest food products ever, and about the strangest thing I could think to substitute for gingerbread. On the inside I didn't have any clever text, it just said "Happy Holidays."

Here was my fake company name for 1996...

Back

Thursday, December 27, 2007

Homemade Christmas Card Retrospective #5

In 1995 I got a little religious, but it was a geeky kind of religious with the three wise men depicted as robots.

On the inside it read...


On the back is my fake card company name for the year...

LinkWithin

Related Posts with Thumbnails